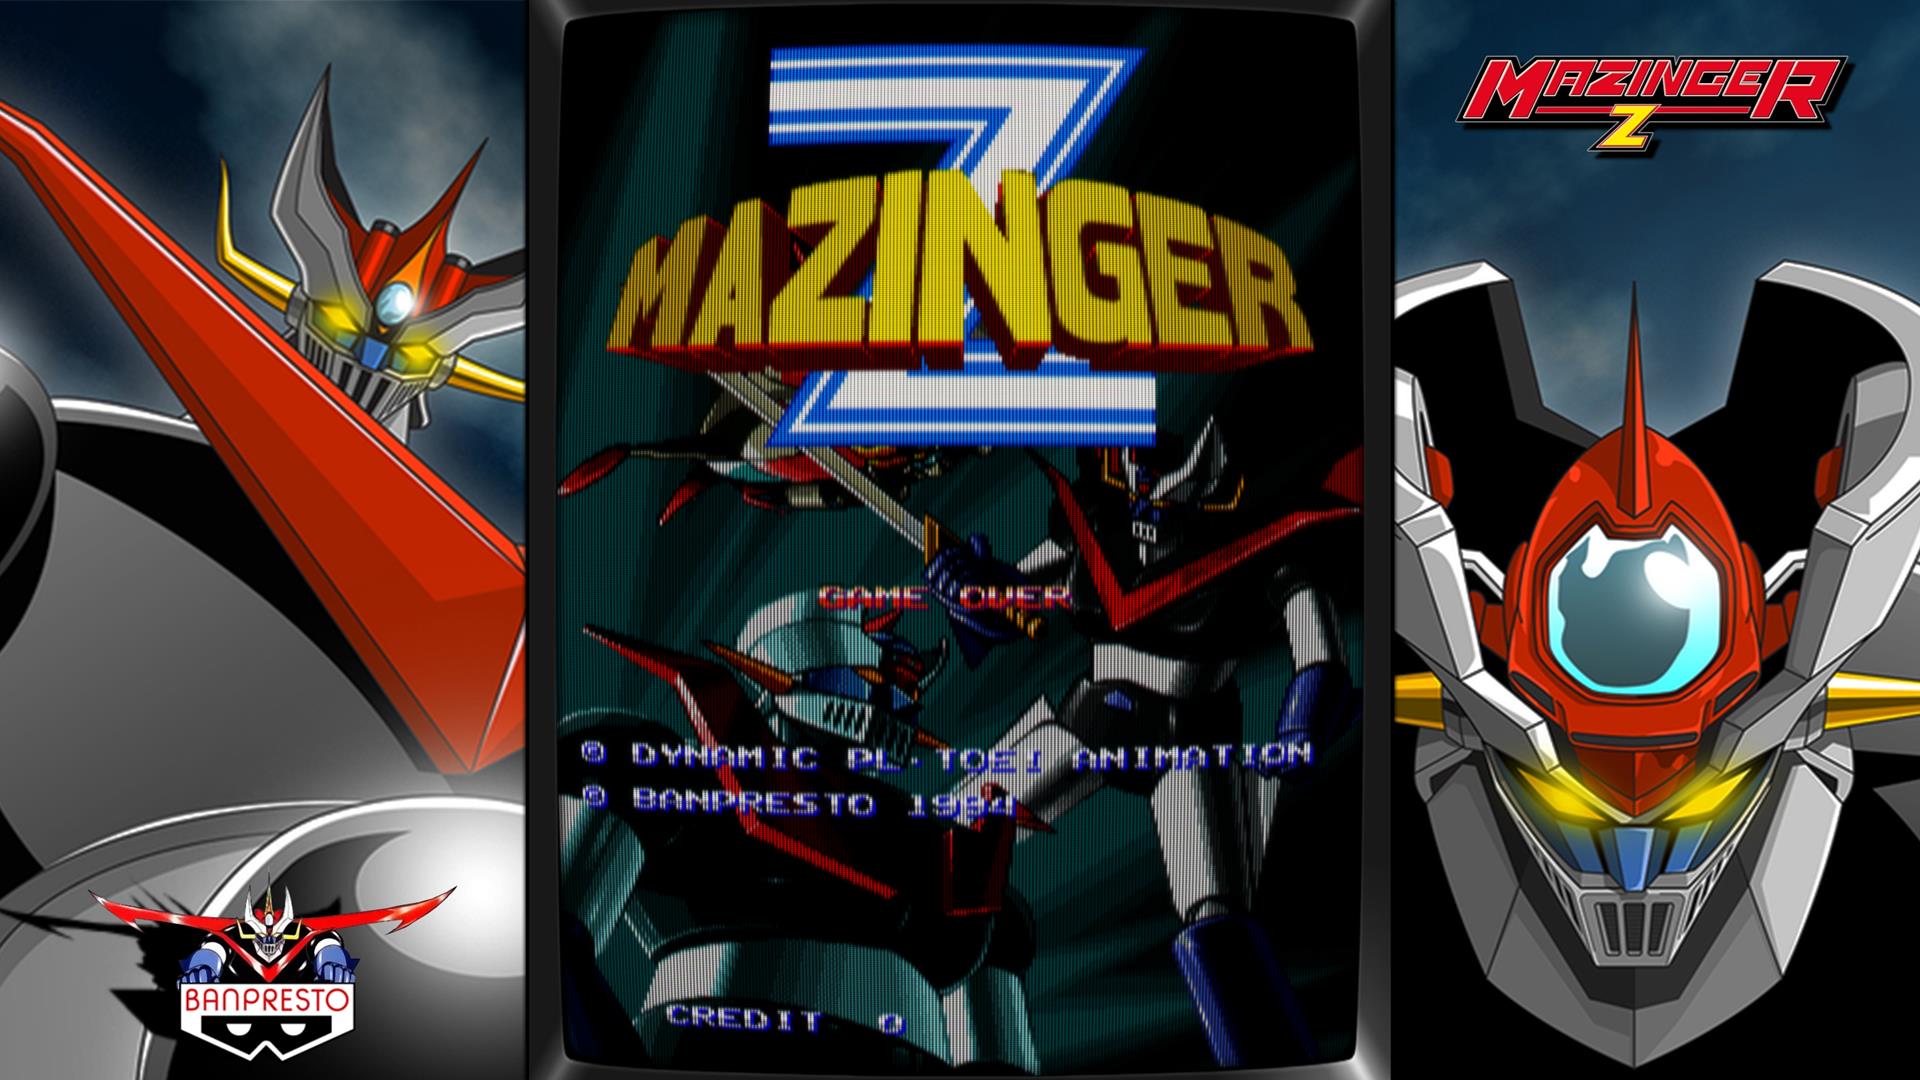
If you’re a retro gaming enthusiast, chances are you’ve encountered the challenge of managing MAME bezels — the artwork and overlays that frame your gameplay. While MAME offers a wealth of generic bezel options, customizing them to be system-specific can elevate your gaming experience, adding a layer of nostalgia and visual authenticity. For those using RocketLauncher, a popular front-end for emulators, ensuring bezels are system-specific isn’t just a nice touch — it’s a functional necessity for streamlined organization and automation. In this guide, we’ll walk you through the process of separating MAME bezels by system, converting them to RocketLauncher-compatible formats, and setting up your collection for a cleaner, more immersive gaming setup. Let’s dive in!
Tools needed for separating and converting:
- Adobe Photoshop
- Adobe Lightroom
- Bulk Rename Utility
- Fotosizer
- Winrar
- Powershell (installed on all windows machines)
There will be a few assumptions in this article. The first assumption is that all mame bezels are in the form of a .rar/.zip files consisting of the bezels themselves and a .lay file. The next assumption is that the zip files are in one main mame folder in the artwork folder of the mame emulator.
Lets say for example that you want to add a section in hyperspin specifically for Atari Classic games and have rlauncher display the bezels instead of MAME . I like to let Rlauncher have control of the bezels because the bezel that is chosen each time is random, and I like variety so launching the game each time produces a different bezel to keep things fresh and new each time. We still need to have these properly sized so this becomes a tedious process to do with each individual bezel, so I’ve come up with a way to do this in mass. While there will be some nuances to each situation, this method should be able to be applied as a rule of thumb.
Separate zips for specific system
In this first step we’re going to seperate the zips from the main mame bezel artwork folder…mine are located at “..\Emulators\Mame 0.270 – 10-26-2024\artwork\MAME”. For this, I will use a script that I have made readily available in my github repo located here. The script will require The official system name of the database and several paths to be able to split the MAME information off from the main source.

After you have successfully split the MAME bezels to the destination folder , unzip all archives to folder and delete the zip files in the destination folder, they are no longer needed….
Bulk Renaming
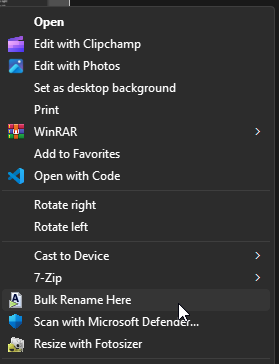
Next, Select all the folders, right-click to open the context menu and open the bulk rename utility. We will need the Bulk Rename Utility to append the folder name to the beginning of each file before extracting the files from the folder themselves. Assuming that the folder name is the correct name of the mame game itself, this will ensure that the name is still tied to the bezel file itself rather than having to visually match each bezel to a game on a guess.
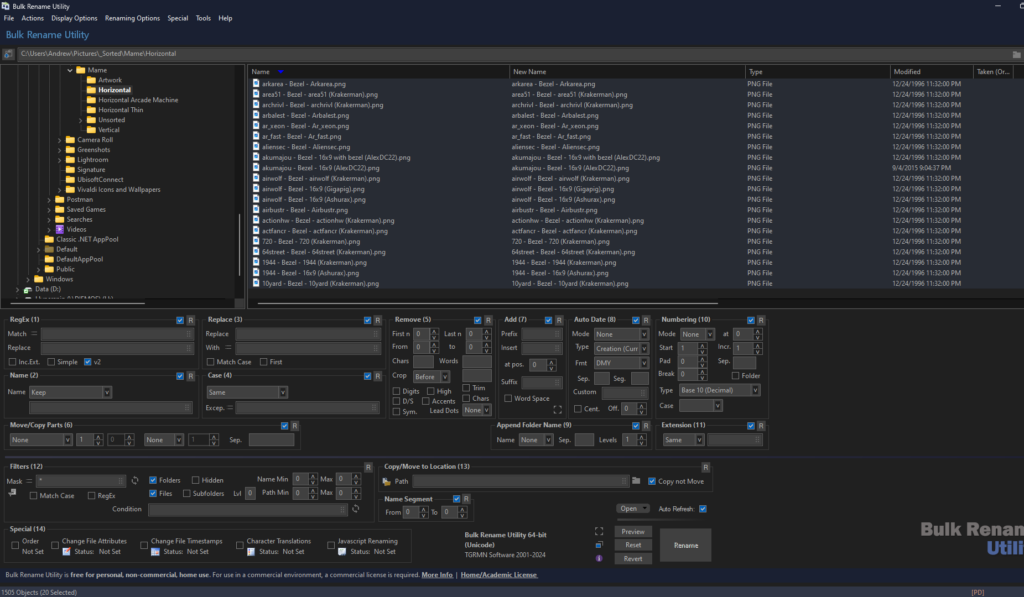
In the Bulk Rename Utility We’ll first need to configure some options to look at the files instead of the folders. In Filters (12), Uncheck Folders and check subfolders, this will show all files listed under subfolders. Next, under Append Folder Name (9), Select the dropdown menu as “Prefix” and add a [space] – [space] in the Separator box next to the drop down.

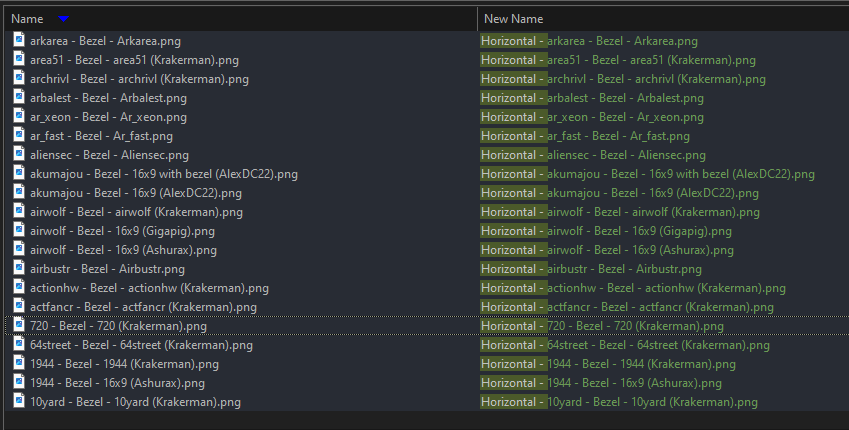
You should see the appended parent folder name to each item in the “New Name” column of the file list”. Once verified that the names are accurately showing in the new name column as expected, Select rename in the lower right hand corner.
Resize all png’s to 1920 x 1080
Next, we’ll use Fotosizer to resize all png’s to bulk size the bezel’s to a 1920×1080 resulution, Most all bezels that are usable will take the resizing specifications without issue, if they are not able to be resized, no problem, they were most likely intended to be used as artwork instead of an actual bezel or they are for a specific cabinet with complex animations in the .lay file, those will need to be handled individually in rlauncher to take precedence over as meme bezels like Red Barron or other AAE games for example that just would not look correct without the use of a color overlay and bezel. This guide mostly focus’s on Traditional games like fighting games, and shooter games that contain a standard outline for the bezels.

Select all subfolders in the main system directory again, right-click and this time select Fotosizer to open all selected files. Make sure the details view is selected to see the size column to spot any deviences in image sizing….notice how some images do not display 1920×1080, these are the ones we want to change.
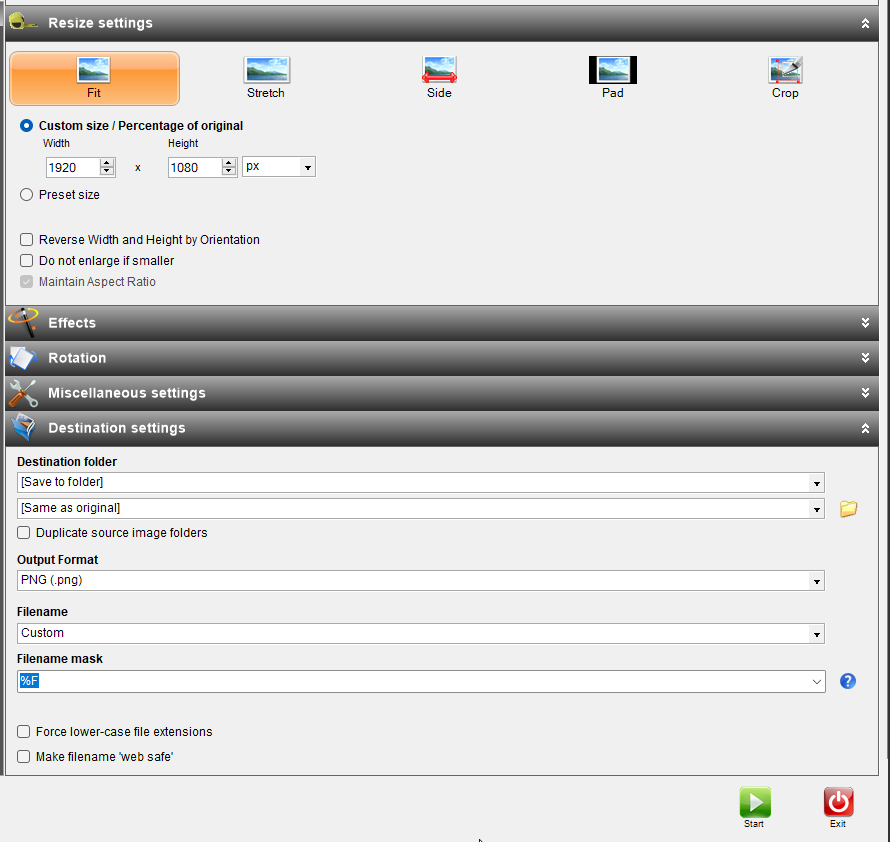
Try to mirror all of the settings of the picture on the left, Setting the resize to “Fit” will keep the aspect ratio the same as the size changes. Dimensions will be 1920×1080, I usually set the compression under Miscellaneous Settings to 75% compression. Under Destination settings I keep the folder the same to overwrite the original file. Output format should be png. and the filename mask should be %F to mirror the existing name of the file. With that, Select start at the bottom right of the screen and convert the files.
Now with the initial bulk rename and standardizing all files that are capable of being resized to 1920×1080 lets get started sorting! This can sometimes be a long process depending on how many bezels you’re dealing with, but the fundamentals are always the same.
Sorting Bezels and Artworks into Catalogs
Open Adobe Lightroom and Create a new catalog. Save the catalog in a place where you commonly store your catalog files for lightroom that is separate from your normal pictures. I have a dedicated folder for Catalogs that I create a sub-directory in Pictures called Hyperspin to store all my Hyperspin catalogs in. Once the new Catalog is created, Select Import and browse to the parent directory that contains the renamed and resized bezels and artwork.
WARNING: this part is a little tedious
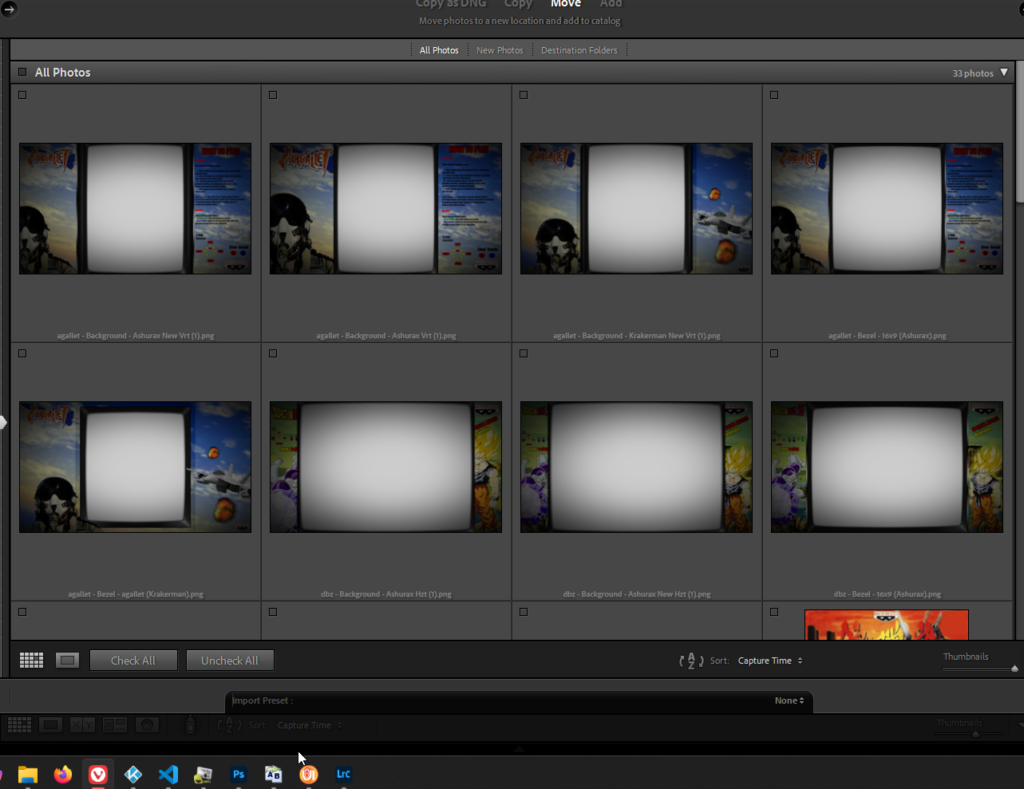
First, I like to move all of the artwork and useless assets out of the directories to just have bezels to work with. I will generically refer to this as ‘Artwork’. Once at the Parent Folder, Uncheck all selected bezels and artwork.
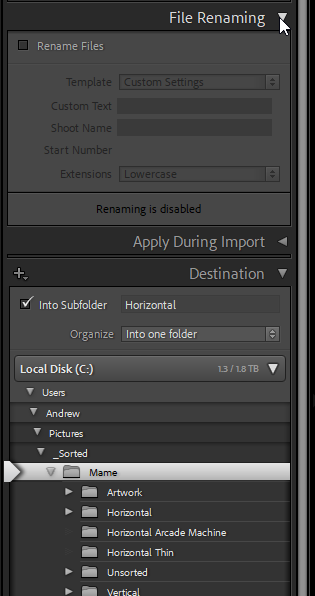
Next, on the Right hand side of Adobe Lightroom, Make sure that No file renaming or file handling options are checked. Instead we want to organize All artwork assets into 1 subfolder that is seperate from the source folder. For this, I create an empty subfolder under Pictures, then create another folder for the system name, then finally Under the destination settings in Adobe Lightroom, make sure “into Subfolder” is checked and give the name “Artwork” , the select the dropdowns to navigate to the subfolder that is created for a destination for the system.

Highlight and check the box of each artwork that is shown, during this process I also select any bezel frame that does not contain artwork sides. There are a variety of tricks to select multiple artworks to speed up the process a little, such as Ctrl+click selects multiple artworks or selecting one artwork and holding shift while selecting a different artworks will select all the consecutive artworks in between If you have the same type of artwork to be sorted.
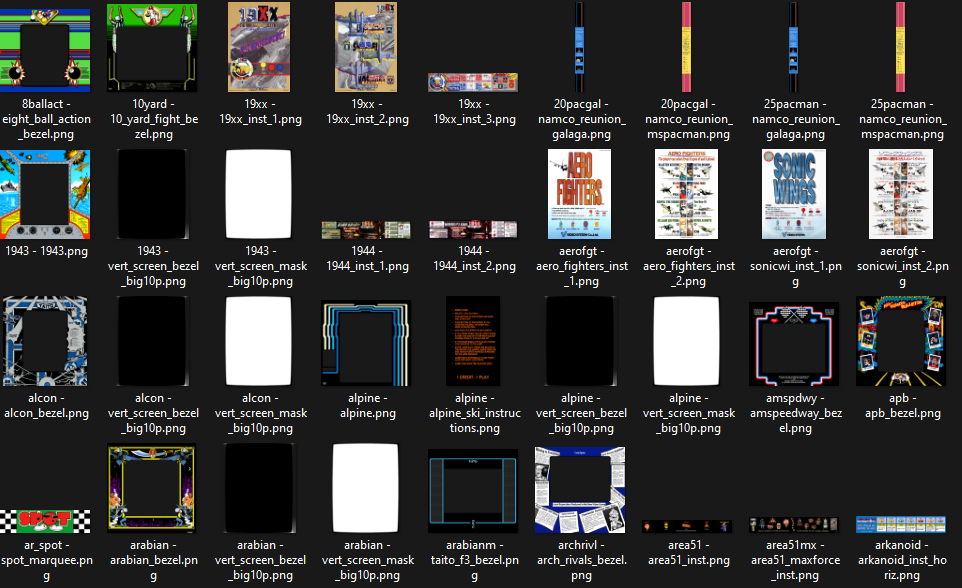
Once finished highlighting and selecting all of the artworks to be moved, and making sure that import settings are correct, select import, this will move all artworks out of their original folder to a destination folder where all artworks are lumped together. Should look similar to the screenshot to the left.
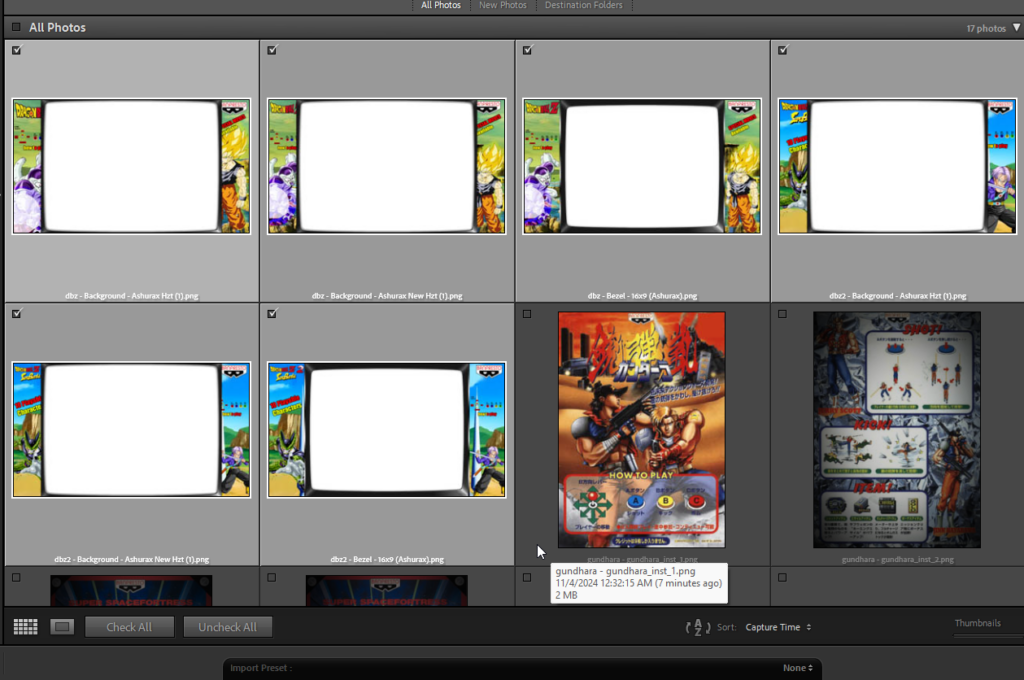
Now that all of the Artwork has been split out of the files, we can focus on the bezels. Create a new Catalog and usually I differentiate at this time between Horizontal and Vertical Oriented bezels. Create a new Catalog named Horizontal and repeat the process by importing all Horizontal oriented bezels into a catalog.
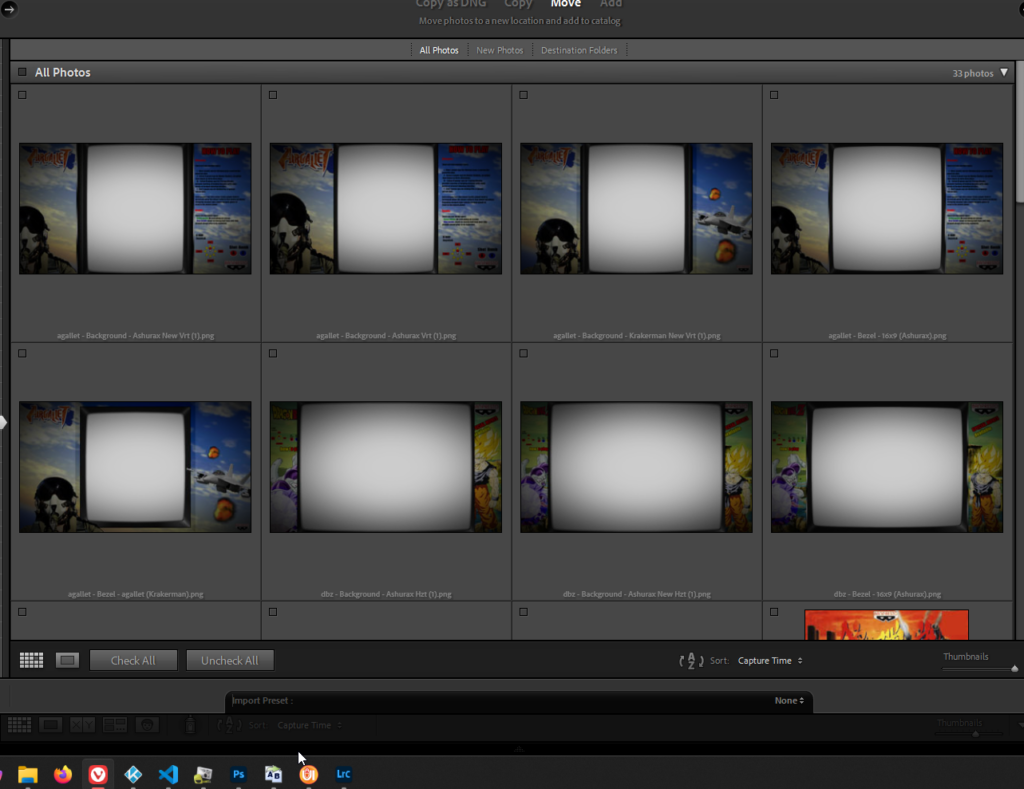
Repeat for Vertical Bezels…

By now, your destination folder structure should look something similar to this with horizontal, vertical, and artworks separated into different folders.
At this time, I usually break each bezel orientation down even further by category. I give them generically descriptive names like Thin, Thick, Wide, Extra Wide, Extra Thick, Borderless, Borderless with minibars, etc. This helps me identify the bezels between each other.

Repeat the process same as before by creating a new Catalog, this type we will call it “Vertical Thin” and focus on just the Vertical Bezels that have a thin border to them. Highlight and select all of the bezels that you are able to visually see that have a thin boarder…In some cases it’s hard to tell, but do your best to make sure they are all the same type of bezel.
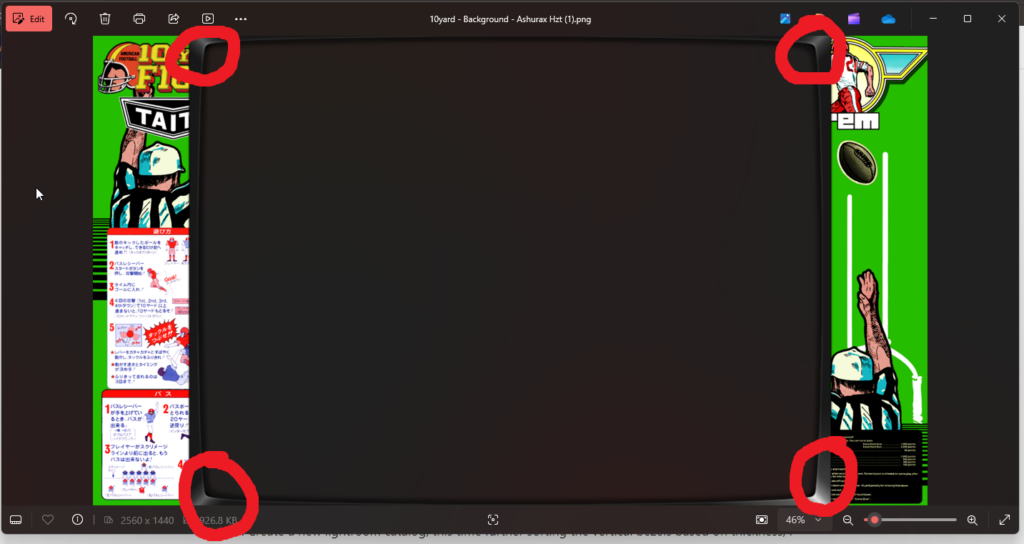
Sometimes I will do this via windows explorer just because it is easier to thumb through the bezels in MS paint. When doing this, I look at the corners of the bezel as I am selecting the left and right arrows on my keyboard. I am looking for the corners to move positions,
If they move, then that tells me the bezel is different size and then I split that bezel into a Category folder like Thin, Thick, etc. If the corners do not move when selecting the right or left arrow then they are the same sized bezel. When you are finished You should have a series of folders below, your mileage may vary depending on how you sorted the bezels.

As you are going through the different bezels you will notice that there are often different thicknesses and different widths to the thicknesses, This is when I start to differentiate by Type and add a number i.e. type 1 Type 2 Type 3, etc.
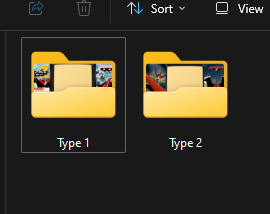
Sorting the bezels is tedious and often mind numbing, but doing it this way, i find is the least amount of work. After All bezels have been sorted in each folder of likeness, we can move on to creating a .ini file for a template.
.ini file and bezel sizing.
I am going to steal an existing ini file from another bezel set, but if you need the existing information from an .ini file you, here…
[General]
Bezel Screen Top Left X Coordinate=
Bezel Screen Top Left Y Coordinate=
Bezel Screen Bottom Right X Coordinate=
Bezel Screen Bottom Right Y Coordinate=
The coordinates are self explanatory, but they reference the top left most pixel point of the area that the screen will be drawn and the bottom right most pixel.
I am going to store this file in the main folder of the sorted bezels and continue to alter this same file as I move through each bezel type. Also I will create an empty folder for the completed bezels to go once I have updated the .ini file.
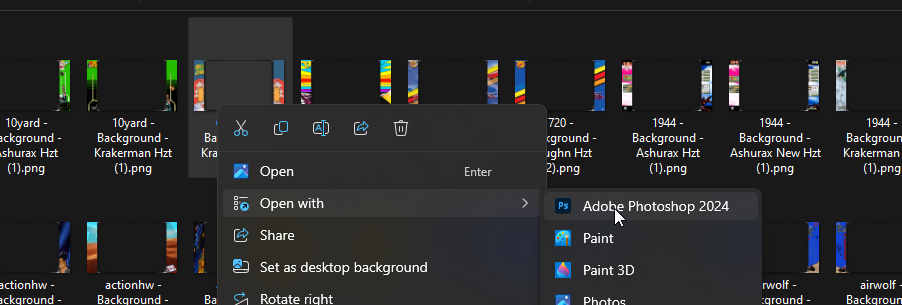
In this example, I will be correct sizing the Horizontal Thin bezels. Pick any bezel from the horizontal thin folder, right-click and open with photoshop.
The imported image should look something like this when it’s sized to 1920×1080
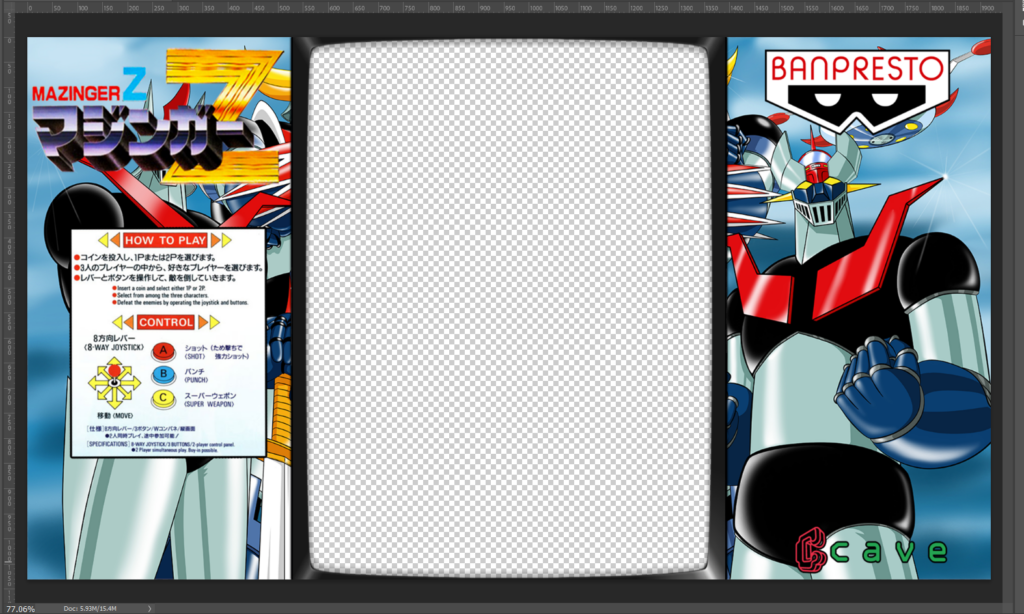
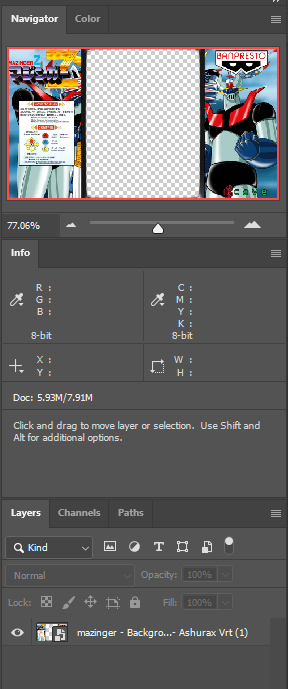
When you open the bezel in Adobe Photoshop, Make sure that the Navigator, Info, and Layers pane are visible on the right hand side of the pallet, We will need the info pane to determine the X,Y coordinates of the layer and the navigator pane will help to move around the image more efficiently.

We will need to create a new layer and use the Rectangle Marquee tool to draw a box roughly the size of the opening of the bezel. It does not need to be exact at this point. Right click the rectangle and select ‘Fill’. I make sure Foreground Color is selected and press ok. The color used will be whatever the main foreground color is current… I prefer a lime green because it is the easiest to see…use whatever color is best for you here.
Next, We need to change the opacity to make the layer transparent to be able to see. Select the layer and set the opacity to 60%.
With the overlay box selected, press Ctrl+T to bring up the resizing boxes on the transparent layer.

Use Ctrl+ +(plus) and Ctrl+ -(minus) to zoom in and out on the image, on each surface you want to get the edge of the box to overlap the bezel by just a couple pixel lines on each side. This will ensure best fit.

Once completed on each side, Zoom in to the upper left hand corner until the image begins to pixelate and place your mouse cursor on the very top-left pixel square and reference the info panel
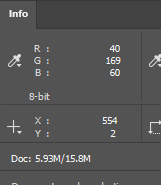
The info panel gives the coordinates of X 554, Y2 so we will enter that in the first two lines of the .ini file. Next, do the same thing in the lower right and we will have the full ini file for this specific bezel size. The lower right corner in this case is X1366, Y1077. Save the Ini file.
[General]
Bezel Screen Top Left X Coordinate=554
Bezel Screen Top Left Y Coordinate=2
Bezel Screen Bottom Right X Coordinate=1366
Bezel Screen Bottom Right Y Coordinate=1077
Moving Bezels to proper folders and replicating the ini file
Now that we have the proper coordinates, this covers all of the bezels in the corresponding Thin folder. However, we will need to create the folders, for this task I have created a powershell script to take a lot of the work out of manual file handling, Having the names in the beginning of the files like we did in the beginning of this tutorial is cruicial for this to work properly, you may grab the script here.
The script in my github is designed to reference the beginning of each file name and create a series of folders in a destination path and also copy the ini file as for as many bezels that exist in each folder. You will need to provide the path of the source and destination and .ini files at the top of the script.
#Variables
$Sourcefolder = "C:\Users\path\Mame\Horizontal Thin\"
$Blankfolder = "C:\Users\path\_Sorted\Mame\Complete\"
$inifile = "C:\Users\path\_Sorted\Mame\Bezel.ini"
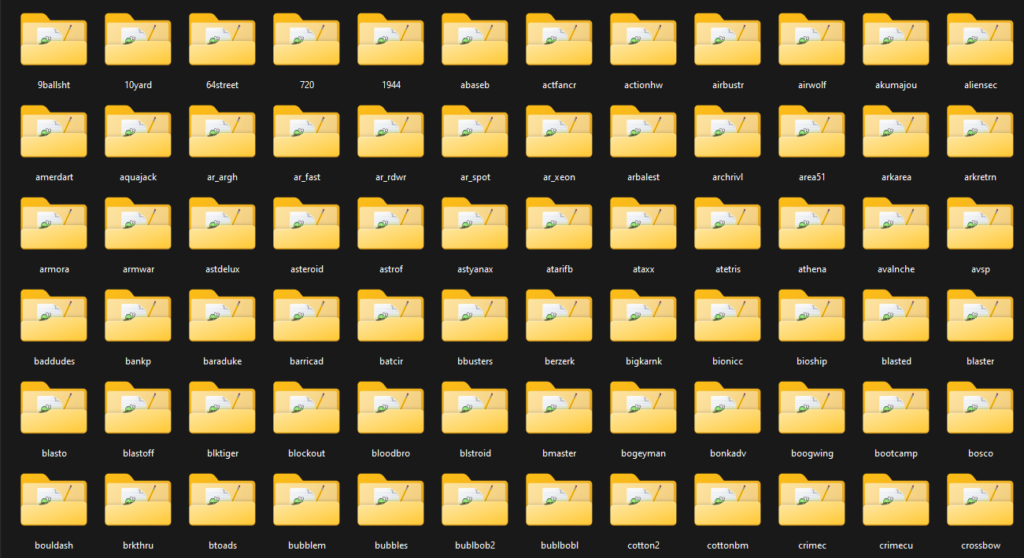
After this, run the script and you should end up with the result shown below in the destination folder with the ini file copied for each bezel and given a generic Bezel##.ini name, next we will bulk rename the files.
Bulk Rename 2nd pass
In this pass of bulk renaming I have come up with my own naming convention for standardizing file organization. This is most visually pleasing to me to make the files identifiable, you can choose whatever you like here, but I prefer this method, the biggest takeaway here is to keep the ini paired with the png file.
Bezel – [systemname] – 1920 x 1080 – [Type] – Visual ## .png
Bezel – [systemname] – 1920 x 1080 – [Type] – Visual ## .ini
Select All folders in the completed folder and open the Bulk rename utility. In the Filters(12) section, Uncheck folders and check subfolders.


Add the previously mentioned naming convention, replacing the system name with your own and the type with the current type of bezel you are working with, I am working with Thin bezels in this case. Also you will want to remove the file extension and numbering, we will add this in momentarily.
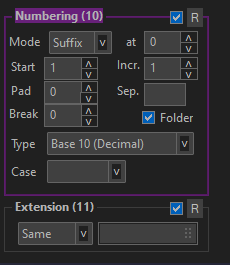
Under Numbering (10), set mode to “Suffix” and check the ‘folder’ option, this will restart the numbering each time a new folder is reached. You may or may not have to add a space in the Sep. box to separate the number from the rest of the naming scheme.
Lastely, In the main panel, sort ascending the “type” column, this should list all ini files at the top. We will first rename all the ini files, then rename all the png files. The first pass should look something like this when all the files are highlighted.

Select rename.
Next, without adjusting any columns, scroll down in the main panel and highlight all the PNG files. Should look like this…

Select Rename
If all goes well, you will have consistently named files for both ini and png files. Select the name column and then the folder column at the top, this should sort the files in an alternating patter, this indicates that there is a 1-1 relationship between each file and bezel.
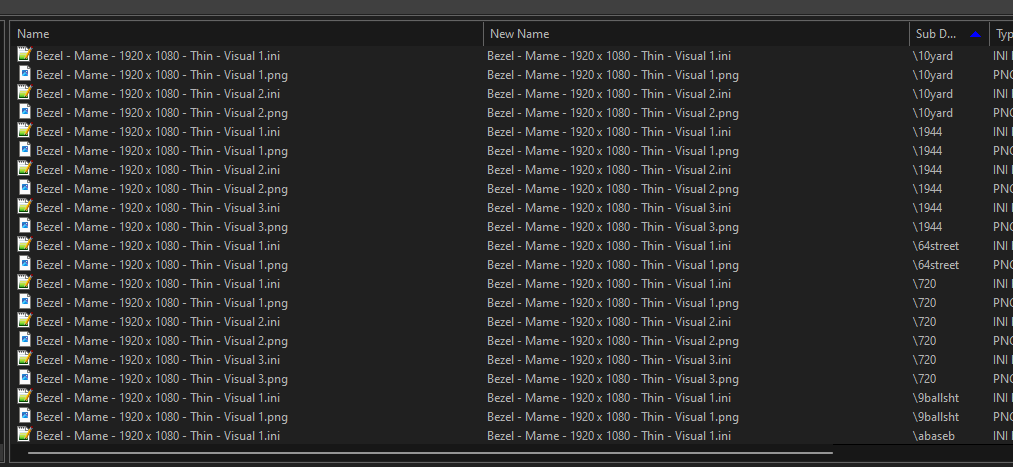
Next we are ready to move the files to their final resting place. Select all the folders and move them to your Rlauncher\Media\Bezels\System folder and plop them in.
Repeat the process for each type of bezel, Thick, extra thick, vertical thin, etc. until all completed, once you complete each type of file, If you have the type listed in the name you should be able to drag and drop each series of folder in the rlaunch media folder without any conflicts. Once all of the types have completed and renamed, we will do one last full rename with the bulk rename utility. This time using the naming convention
Bezel – [systemname] – 1920 x 1080 – Visual ## .png
Bezel – [systemname] – 1920 x 1080 – Visual ## .ini
The ‘type’ placeholder is no longer needed once all files are together. If you like, you may even append the folder name to the end of the file to give an identifiable filename for the type of mamegame that goes with each file via the “Append Folder Name (9)” box in the bulk rename utility, I usually append it as a suffix at the end of the name. Should look something like this when you’re all finished. I sometimes create a “_Not used” Folder within the game folder if there are bezels that I do not want to see in the rotation.

This is a VERY tedious process, but with enough attention to detail it can be achieved and produces the best results to give consistent and accurate bezel management to your arcade setup. Thanks for reading all the way to the end and let me know if you have any questions!

